Seamless Blender Transitions
This process was used to ‘merge’ together a terrain mesh and smaller cliff meshes for Desert Angels using Blender. They remained functionally different meshes, but this process will change the normals of the faces of the cliff intersecting the terrain so that when textures are applied, they are as seamless as possible.
End Result
Note: These aren’t the final terrain pieces used in the game, but are a good demonstration of the effect on the cliffs.
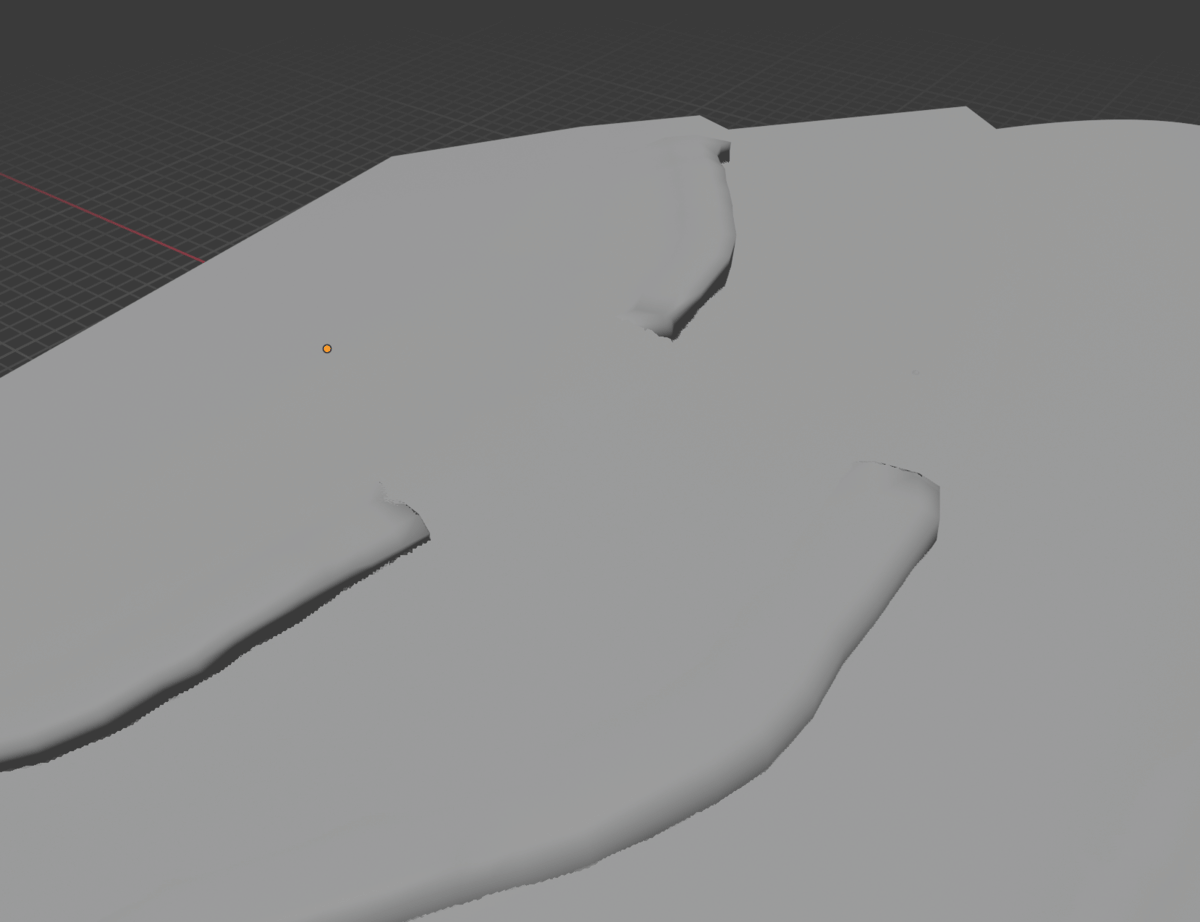
How the pieces are modeled, ignoring normals (you can see the geometry intersecting here):
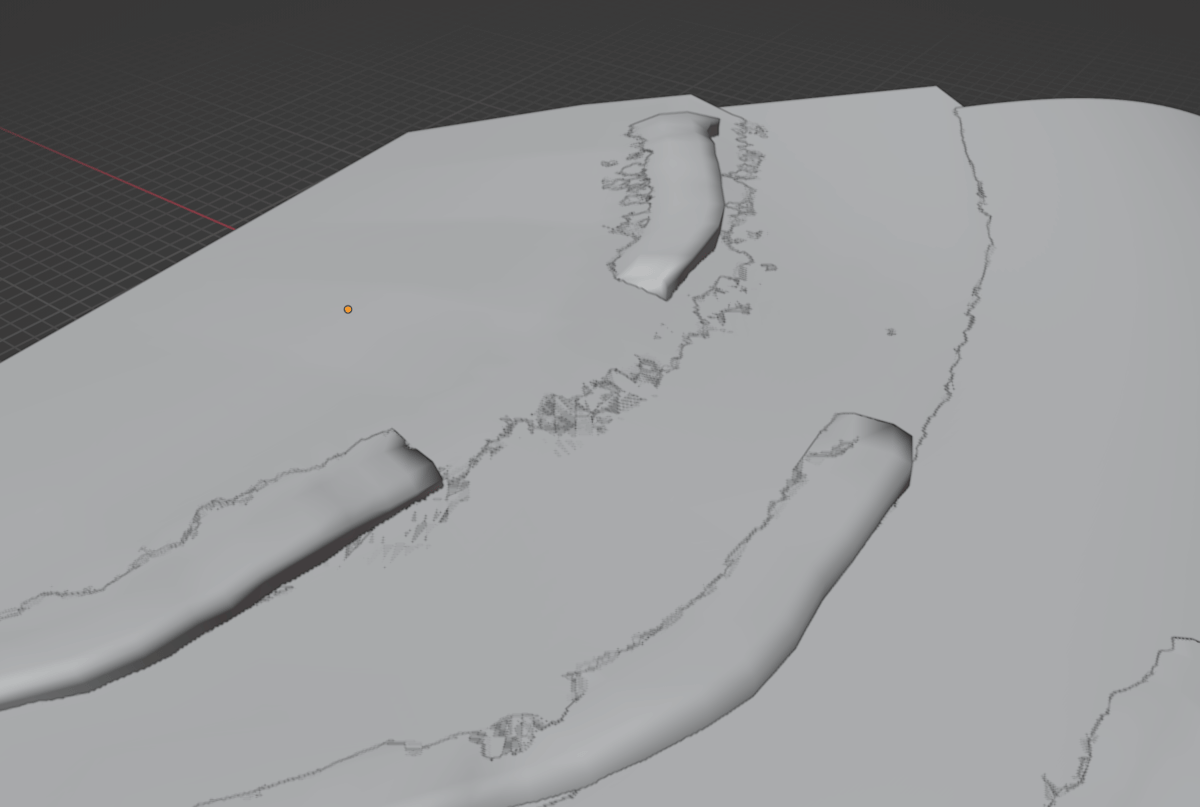
How the pieces look when rendered with normals (notice that the cliffs are now smooth)
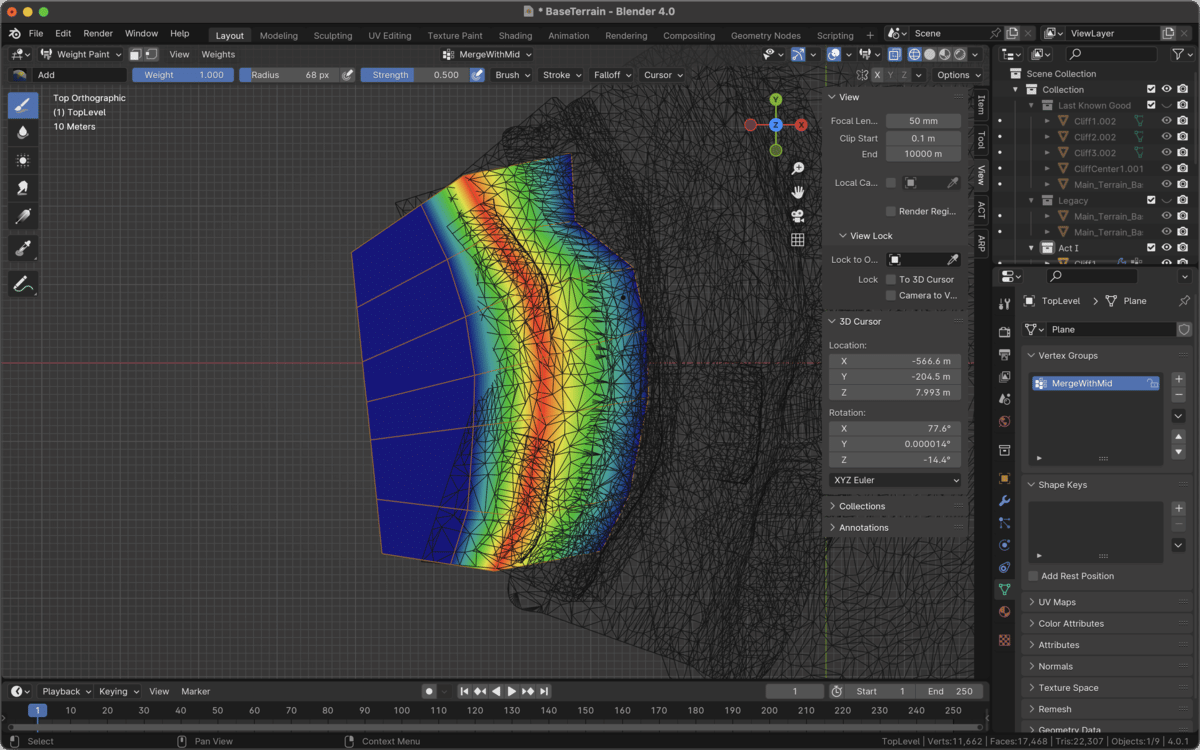
Step 1: Create a vertex group and weight paint the areas around the seam
This painting is done on the cliff mesh, which is the mesh that we want to modify as part of this process.
This vertex group will be used in a ShrinkWrap and Data Transfer modifier to ensure that the two objects match up. We want to make sure that at the area where the two meshes line up, the group’s weight is at its maximum.
See here, called MergeWithMid:
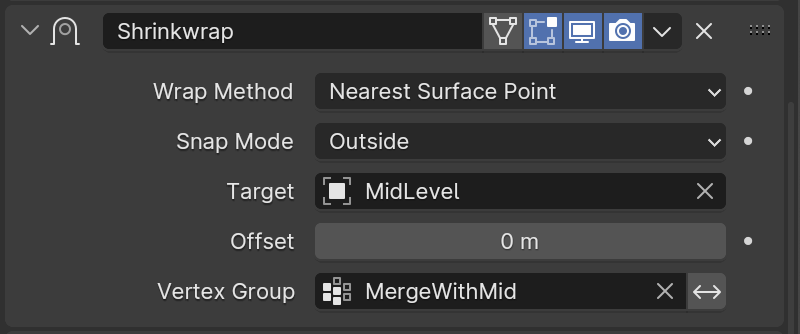
Step 2: Apply modifiers
Shrinkwrap the (cliff) object to the one it should share seams with (terrain) - make sure that you set the new Vertex Group in the modifier window so the shrinkwrap is affected by the weight of the vertex group. This makes sure that the vertices in the group share position with the position of the terrain.
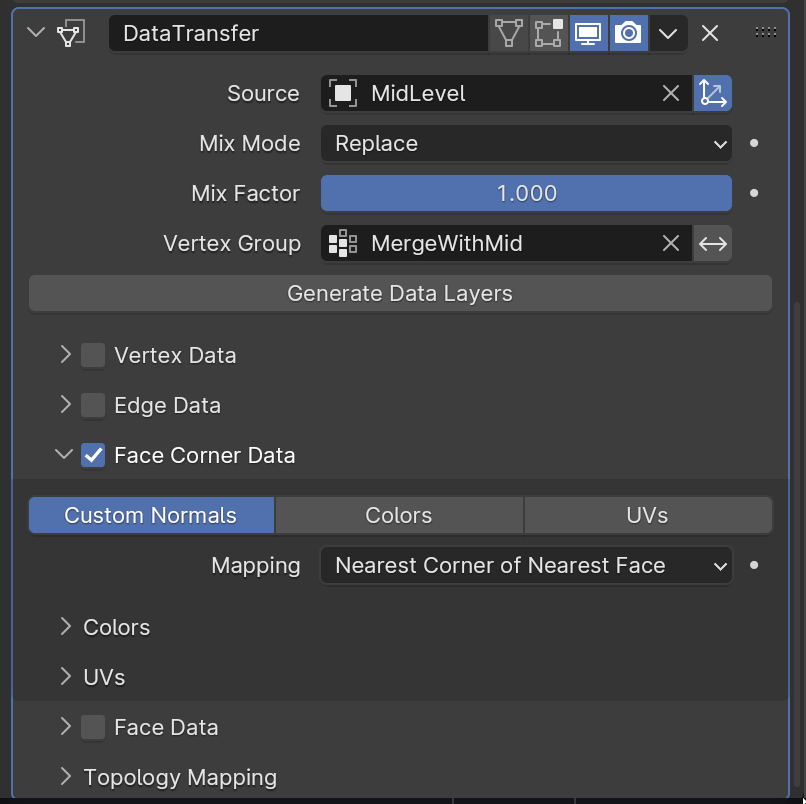
Then, add the Data Transfer Modifier to the cliff, select terrain mesh as a source, check Face Corner Data and Custom Normals and select Nearest Corner Of Nearest Face. This will copy the terrain’s normals onto the cliff, and it should not have as much of a seam.
References
See https://blender.stackexchange.com/a/98160 for source instructions.